Showing posts with label crochet. Show all posts

Saturday, March 11, 2017

Foldable Flying Disc – A Crochet Pattern

One of my favorite things about the Christmas season is putting together a couple of boxes for Operation Christmas Child, a project by Samaritan’s Purse. It’s pretty simple: fill a shoebox with objects for a kid in need, deliver to a drop-off point (in my case, my church), and Samaritan’s Purse teams up with local groups around the world to deliver shoeboxes to excited kids. You choose boy or girl and an age group: 2 to 4 years, 5 to 9 years, or 10 to 14 years. (We originally did two boxes for 5 to 9, one each for a boy and a girl. Now, we do boxes for 10 to 14-year-old boys; I noticed they were always underrepresented at both of the churches where I participated. I’ve since learned this is universally the case!)

I love putting Frisbees in my boxes! They are great for boys or girls; a group of kids can use it to play together; it doesn't require much besides some open space. But real Frisbees are expensive, and I don’t like putting low-quality items in boxes (which describes every generic flying disc I've seen). I figure if a kid doesn’t get very many gifts, I should send them something that will last! Besides, even if I can find a maximum size shoebox, it’s really hard to fit a Frisbee in there. (And it makes it harder to pack it really full.)

A year or two ago, I came across the Pocket Disc, a crocheted foldable flying disc (the generic name for a Frisbee). They are great—well made, sturdy, and available in a plethora of patterns and colors. But they’re about $15 each, and that could buy a lot of items for a box.

I finally got around to figuring out a pattern for a similar folding disc. It’s not exactly the same; mine has just two strands of worsted-weight yarn, instead of several strands of thin yarn in different colors, limiting the pattern options. But my disc flies well, it’s easy to crochet, and you can make it with whatever yarn you have on hand. Best of all, gauge isn’t critical; just make sure it’s nice and tight!

On to the pattern…

Foldable Flying Disc

Materials

  • Worsted weight yarn, cotton or acrylic, about 100 yards†
  • G or H hook (choose the size needed to make a very firm fabric)
  • Split stitch marker or safety pin
  • Yarn needle

Abbreviations

Written using American crochet terms.
  • sc single crochet
  • sc2tog single crochet two together
  • pm place marker
  • ( )* repeat stitches in parentheses
  • sl st slip stitch
  • st stitch(es)

Instructions

Worked in a spiral, using two strands of yarn held together.
  1. Begin with 12 sc stitches, using a magic loop. (You will need a much bigger loop than usual.) Tighten the tails to get a firm base. If in doubt, make it a bit looser; you can tighten it more later, but it’s nearly impossible to loosen it.
  2. sc, pm in first stitch, 2 sc in next stitch; (sc, 2 sc in next stitch)* to end of round. (18 st)
Starting with the third round, remove the marker when you reach the end of the round, then start the next round by working into the first stitch of the previous round; place marker in the first stitch.
  1. sc, pm, 2 sc in next stitch, sc; (sc, 2 sc in next stitch, sc)* to end of round. (24 st)
  2. sc, pm, 2 sc, 2 sc in next stitch; (3 sc, 2 sc in next stitch)* to end of round. (30 st)
  3. sc, pm, sc, 2 sc in next stitch, 2 sc; (2 sc, 2 sc in next stitch, 2 sc)* to end of round. (36 st)
  4. sc, pm, 4 sc, 2 sc in next stitch; (5 sc, 2 sc in next stitch)* to end of round. (42 st)
  5. sc, pm, 2 sc, 2 sc in next stitch, 3 sc; (3 sc, 2 sc in next stitch, 3 sc)* to end of round. (48 st)
  6. sc, pm, 6 sc, 2 sc in next stitch; (7 sc, 2 sc in next stitch)* to end of round. (54 st)
  7. sc, pm, 3 sc, 2 sc in next stitch, 4 sc; (4 sc, 2 sc in next stitch, 4 sc)* to end of round. (60 st)
  8. sc, pm, 8 sc, 2 sc in next stitch; (9 sc, 2 sc in next stitch)* to end of round. (66 st)
  9. sc, pm, 4 sc, 2 sc in next stitch, 5 sc; (5 sc, 2 sc in next stitch, 5 sc)* to end of round. (72 st)
  10. sc, pm, 10 sc, 2 sc in next stitch; (11 sc, 2 sc in next stitch)* to end of round. (78 st)
  11. sc, pm, 5 sc, 2 sc in next stitch, 6 sc; (6 sc, 2 sc in next stitch, 6 sc)* to end of round. (84 st)
At this point, begin decreasing for the folded-under rim.
  1. sc, pm, 4 sc, sc2tog; (5 sc, sc2tog)* to end of round. (72 st)
  2. sc, pm, sc, sc2tog, 2 sc; (2 sc, sc2tog, 2 sc)* to end of round; sl st to join round. (60 st).
If you haven’t already, tighten up the center of the magic loop to make it lay flat and feel firm. Weave in ends, making them very secure. Hopefully, this is going to gets lots of use!

Notes

  • This is more of a template than a pattern. You’re increasing six stitches per round to create a flat disc, then decreasing twelve stitches per round to create the rim.
  • If your disc begins to ripple, spread out your next set of increases over two rounds. In other words, add three stitches each for two rounds. You will end up with fourteen rounds before the decreases (instead of thirteen) to get 84 stitches.
  • It’s easy to vary the size by crocheting more or fewer rounds. However, the math is easiest if you end with a multiple of twelve stitches before beginning the decreases.

†Regarding Yarn

I have made this with cotton yarn and acrylic. For the cotton yarn, my best results came with an H hook. My acrylic yarn, Caron Simply Soft, turned out best with a G hook; an H hook worked, but the tighter gauge looked and felt better. I also tried one with one strand of Vanna's Choice and one strand of Simply Soft. The G hook still produced the best fabric, but the resulting disc felt a bit springier and more cushiony. My guess is that, if you used two strands of Vanna's Choice or a similar yarn, you would need an H hook.

After the third round or so, check your fabric. If it feels too floppy, frog it and start over with a smaller hook; it's best to fix it early on, instead of plodding on and ending up with an unsatisfactory product. After all, three rounds isn't that much of a time investment.


I can't stop anyone from using my pattern to make and sell their own discs, but I would prefer you didn't, unless it's for charity. And if you like my pattern, I encourage you to make a few to donate to the charity of your choice. Make it in wool (maybe adding a few rows) and felt it, for a really sturdy dog toy. Or donate a few to a kid's charity, like a hospital or shelter. Share the love. :) If you do, I would love to know about it!

Thursday, June 25, 2009

Shock and Awe

My husband and I are in the processing of buying a house. By in the process, I mean we keep driving through neighborhoods, my husband haunts movoto.com, and we've actually talked to a mortgage guy and a real estate agent. We have not actually chosen a house, but we better if we want to move on time!

In preparation, I have decided I should probably start going through stuff and packing. I think I'd be more motivate on the packing front if I had not shouldered ninety-five percent of the responsibility last year. Maybe it was more; since my husband was cramming for summer classes, all I remember him packing was his cookbook collection. Actually, I think he went through them and I packed them after he had purged his collection slightly, and we had returned his mom's books.

You get my point. Anyway, I decided to start with my yarn, because I've noticed that it has spread all over the house.

I'm still in shock. I never thought I had much stash; I listen to some women talk about their stashes, and theirs are huge! I never buy that much yarn.

Behold! I have bins of the stuff. WHERE DID IT COME FROM? HOW DID I COLLECT SO MUCH YARN?

My Stash (by Maid Mirawyn)

And why do my UFOs number in the double digits? I tried counting some of them as WIPS, but I had to admit that if I've knit less than a row in the past three weeks, it's not really "in progress", per se.

A Few of my UFOs
A few of my UFOs

Tuesday, January 20, 2009

The Pink! It Burns!

Back in November I made a wavy hat for my mom, using Patons SWS (Natural Raisin and Natural Indigo from the Soy Wool Solids). It was the second chemo cap I made for her. Unfortunately for me, my sister saw it, and she wants one. And sadly, my sister likes pink.

So I'm crocheting with pink. Blech. I hate pink. In fact, I hate pink even more than orange…and I detest orange. One facet of pink that drives me nuts is the assumption that women want pink. Manufacturers look at their product and say, "Oh, we need to target the female market segment. Um, make it pink. What's next on the agenda?" It's insulting, really.

But that's a different rant. Back to the fiber-y goodness!

I decided that if I was going to crochet with pink, it was going to be good pink. This cap has one saving grace in my book: it's Malabrigo. Malabrigo Merino Worsted in 021 Cactus Flower, to be exact. And it is simply one of the most divine yarns on this planet. It's wonderfully soft, and the colors are gorgeous. It's kettle-dyed by a women's coop in Uruguay, and if you've never tried it you should run straight to your local yarn store and buy a skein or five.

Did I mention the wonderful colorways? The traditional Malabrigo–Merino Worsted, the one that made them famous–is available in true solids and semi-solids as well as variegated. All the colors are sublime. The dark colors are deep and rich with real dimension; the brights are clear and clean; the pastels are pure and soft. There are colors that I don't particularly care for (like pink), but there are no bad colors.

Oh, right, I'm making a hat. Back to the wavy hat.

If you like crocheted ripple afghans and you enjoy a little whimsy, you'll like this hat. It's from One-Skein Wonders by Judith Durant, and it uses the traditional ripple construction (grouped increases alternating with grouped decreases) to create the same type of points.

The top is very fun: each point is stitched together, so it creates a star shape when seen from above. In the book, it's stitched with a contrasting color, and a couple of dangling tassels are attached. This is my third wavy cap, and I haven't actually used the tassels yet. I do, however, use the contrasting stitching.

All in all, it's very quick to make; I started this one yesterday, and it should be finished tomorrow. That's only three days of rather limited crochet time.

It's a good thing I love my sister, because this pink overload may kill me!

Update: As you can see, I finished the hat. Trust me–it looks WAY better on my sister!

Monday, December 29, 2008

BPAL Felted Travel Case

BPAL Felted Perfume Bottle CaseA little over a year ago, I developed a love of Black Phoenix Alchemy Lab, an indie perfumery. If you've never tried their perfume oil, it's incredible; you can find reviews of the fragrances (and other information) at BPAL Madness, a fan forum. (Yes, a fan forum, with over 16,000 members. Yes, I said 16,000.) Go right now and pick out six general catalog scents you like. Then go and order a pack of 1 mL imp's ears!

Hooked yet? Good. You will soon have a deep-seated need to take BPAL with you everywhere. For most people, a couple of bottles or a handful of imps do the job, but that's never enough for me. In fact, I've developed a bit of a reputation for it. I'm not an addict, though; I can stop anytime. Really. If I wanted to, of course.

Anyway, I had a bit of Malabrigo Merino Worsted sitting around, left over from my lovely shawl. And I needed a way to carry my bottles, so I whipped this up while watching the Battlestar Galactica miniseries. Felted it, too, before it was finished. Total time was maybe two hours.

It will hold three bottles, or two bottles and a few imps. You can easily adapt the pattern to any size. (If you can really call something so simple a pattern, that is.)

Supplies
About a quarter of a skein Malabrigo Merino Worsted
Large button
Scrap thread to baste the button in place
Size I crochet hook
Tapestry needle
Split stitch marker
Two safety pins

Before you start, lay three 5mL perfume bottles in a row on a piece of plastic wrap. Securely wrap them in the plastic, then set them aside. You'll use these to gauge the size of your case as you work and to check the progress of your felting.

The entire piece is worked in a spiral until you reach the flap, which is worked back and forth.

Crocheting the Pouch
Chain 10 stitches for your foundation chain.

Round 1: SC into the second chain from your hook. This is your first stitch. Sc1 in each stitch until the last chain. Sc3 in the last chain. Do not turn the piece; instead, continue in the round, and sc1 in the other side of each stitch, until you are back at the first chain. Sc2 in that stitch, for a total of three single crochet stitches in each end chain. (20 stitches)

Check this against your bottles; it should be about the same length as the three bottles, and just a little less than one bottle wide. Round 2 will make a case a bit bigger than your bottles, to allow for light felting.

Round 2: Ch1, then sc1 in each stitch until you reach the end of the oval. Sc3 in that stitch, then sc1 in each st until you reach the other end. Sc2 in the same stitch you made the first sc in. (24 stitches)

You are now finished with the base and will start up the sides. Place a split marker (or safety pin) at the start of the round and move it up as you work, even though you'll be working in a spiral. It makes it easier when you get to the flap.

Round 3: Sc1 in each sc. Repeat until it's about 2.5" high.

Check the height against your bottles. You want it a little less than .5" higher than your bottles when they're in the case.

Flap row 1: Begin the flap at the start of a round. Ch1 then sc1 in the first sc. Sc1 in each of the next 10 st, then ch1 and turn.

Repeat row 1 until the flap is the desired length. (Mine was about 2.5" long, which gave me plenty of overlap and placed the button in the center of the front panel.) Fasten off your last stitch, and leave enough of a tail to weave in the ends.

The Button Loop
Place your perfumes back in the case, and fold over the flap. Determine where you want the button and baste it in place; you'll sew it on permanently once the case is felted. (If you use a button with a shank, you can attach it with a safety pin.) Look at the button and figure out where you want the button loop. Mark attachment points for the loop with safety pins. (Remember that you'll be felting your piece, so make the loop a little longer than it needs to be.) Once you've got the flap marked, you can remove the bottles.

Place the hook through the edge stitch closest to the first safety pin and pull your yarn through, leaving enough of an end to weave it in. Chain a cord for the button loop. Attach the last stitch to the flap at the second safety pin, just as you attached the yarn at the beginning. Fasten off your yarn.

Before you cut the yarn, test it with the bottles again. Does the flap close and button securely? Good. Weave in your ends, keeping in mind that the felting will help hold them in place. Cut off the excess and proceed to felting. (I recommend removing the button now and sewing it back on when you're through.)

Felting the Pouch
There are excellent instructions for felting all over the internet, including Knitty, and I bet a lot of you know far more about it than I do. I used a big mixing bowl and dish gloves to felt mine, since the washing machine seemed wasteful for such a small item.

Remember how you wrapped your bottles in plastic wrap? It made them easier to work with before, but now it's essential. You need to check your progress as you felt. If you stick unprotected bottles in a wet pouch, you'll damage the labels. My Boomslang, Rose Red, and Peacock Queen bear mute testimony to this sad fact...

Once your case is felted down to size, get the water out of it (spin cycle or rolling it up in a towel and squeezing it) and put the bottles back in. Wrap the flap back into position, and leave it to dry. The button can be sewn back on once it's mostly dry.


And you're finished! The Precious will be much safer in its soft little home.

Wednesday, December 10, 2008

Crafting Like Crazy

So, it's only fifteen days until Christmas, and I still have lots of holiday gifts to make. I've already missed the deadline for my dance instructor's Ogee Lace Skirt, so that one won't happen until the new year, when classes start back. But I have to send out an ATC for a swap soon, as well as twelve Christmas ATCs which I offered to do instead of Christmas cards for a swap at Fans for Christ. I have to knit hats for my two nephews by December 26. (Did I mention I've never knit a hat?)

On top of that, I just remembered that I had decided to knit a shawl and maybe crochet a purse for my bosses' daughter...and that would be for Friday night. Eek. I am using Rowan Handknit Cotton in two shades of pink, which was in my stash, and the Simple yet Effective Shawl pattern from Cosmopluto Knits. (I made myself a shawl using the pattern, and it was very easy.)

Don't expect to be doing anything else anytime soon. Let's hope I make my deadlines!

Wednesday, April 16, 2008

A New Wheel of Time Scarf: Min Farshaw

So I've started a new Wheel of Time-inspired scarf. (The first one was my Pevara Sedai scarf.) I didn't actually mean to cast this one on; I received a gorgeous blue yarn ball from leahsimone through the Yarn Ball - Surprises! swap at Swap-Bot.

I didn't have time to wind the yarn into a center pull ball when I received it, so after unwinding just a bit of it, I shut it firmly in a drawer and pretended it didn't exist until I had time to enjoy unwinding it! So when we went to Columbus (Georgia) for my nephew's first birthday party, I took advantage of the long car ride to unwind it, and rewind it on my nostepinde (a beautiful one I bought from EwenMe a few months ago).

And then there were stitches cast on my needles…don't know how they got there.

It's a beautiful medium blue, very soft, but only twenty-seven stitches wide on size 8 US needles. The center part is based off the Street Urchin pattern from the 2008 SnB calendar, and the first four and last four stitches are just like on my Pevara scarf. So far, I'm very happy with it!

Monday, March 17, 2008

Baby Fluffy Tribble

Port Wine-Swiss Alm TribbleRemember what they say about never feeding tribbles? Well, I fed Myrtle, my first tribble. I ended up with Mac...


Supplies
Lion Brand Fun Fur, Red (a little less than one half skein)
Yarn Bee Wild Child, Pecan (a little less than one half skein)

K hook
Yarn needle

Polyester stuffing


Top half
Round 1: Using the magic adjustable ring, ch 1, then sc 8. Join.

Round 2: Ch 1 for the turning ch, then sc 2 in ea sc. (16 st)

Round 3: Ch 1 for turning ch, *sc 2 in next sc, sc 1 in next sc* repeat 7 more times, then join. (24 st)

Round 4: Ch 1 for turning ch, *sc 1 in 5 next sc, sc 2 in next sc* repeat 3 more times, then join. (28 st)

Round 5: Ch 1 for turning ch, sc 1 in ea sc, join. (28 st)

Round 6: repeat

Round 7: repeat

Leave a very long tail on this, at least four times the circumference of the piece; you'll use it to sew the tribble together.


Bottom Half
Round 1: Using the magic adjustable ring, ch 1, then sc 8. Join.

Round 2: Ch 1 for the turning ch, then sc 2 in ea sc. (16 st)

Round 3: Ch 1 for turning ch, *sc 2 in next sc, sc 1 in next sc* repeat 7 more times, then join. (24 st)

Round 4: Ch 1 for turning ch, *sc 1 in 5 next sc, sc 2 in next sc* repeat 3 more times, then join. (28 st)

Round 5: Ch 1 for turning ch, sc 1 in ea sc. (28 st)

Leave a short tail; weave it through a couple of stitches, then forget about it.


Assembly
Once again, this probably isn't the best way to sew a tribble, but it works.

First, decide which side you want to be on the outside. Every time I've made one, the wrong side has been fluffier. If that's the case for you, use a yarn needle to pull the tails from the adjustable ring to the less-fluffy side. From now on, the fluffy side is the right side.

Place the fluffy sides together. Thread your yarn needle with the long tails from the top half. Line up the stitches, and whipstitch the two pieces together using one or two stitches per pair of single crochet stitches. (The diameters of the two halves may be a little different, but you have the same number of stitches, so it will work out fine.) If the tails from the bottom half of the tribble are on the inside, pull them to the outside so they'll be hidden once it's turned and stuffed. Leave enough of a gap to turn your tribble right side out.

Once you've turned the tribble, stuff it. You don't want it packed firm, but you will probably need more stuffing that you think. (Unless you've made lots of stuffed toys.) Once you like your results, stitch the opening shut.

Knot the ends, then thread the needle with only one strand of the yarn. Squeeze the tribble flat, then push the needle into the seam near the knot and pull it out through the top or bottom of the tribble. Still squeezing the tribble, trim the end close to the body of the tribble; this is a little tricky, since it's so fluffy! Once you let it go, the end will disappear into the body. Repeat with the other strand of yarn.

The seam will probably be very visible, but you can fix that. The long fluffy pieces will be stuck in the seam. Use your needle or fingers to pull the fibers loose, and the stitching will disappear. Take care, though, that you don't snag the body of the yarn (the thick part you crocheted with.)


*About yarns: You can use any eyelash or fuzzy yarn you want! My first tribble used two strands of Wild Child, and the result was a blended, tonal look. (One strand was a solid, the other was two tone.) Mac used two different yarns: Lion Brand Fun Fur and Wild Child. The Fun Fur is longer, so it really took over; the brown yarn recedes, producing an undercoat. I just finished a tribble that uses two strands of Fun Fur, and it was a nightmare! The longer, unruly eyelashes tend to tangle horribly! But it's still cute as can be. :)

Sunday, December 2, 2007

Thank you, Ravelry!

Well, I didn't find out about ThankRavelDay until today, which is sorta later. So I'll take this chance to express publicly just how impressed I am by what Jess and Casey have done! I'm so glad they have put so much time and ingenuity into it.

If you aren't familiar with it, Ravelry is a knit and crochet community. That's very simplified, though. Ravelry's biggest strength is that virtually everything is interlinked! It has some really unique features, too. The best may be the forum radar: you can watch the new forum posts from all over the site pop up one after another on one page. It's fun.

The quality level of everything on Ravelry is very high. Jess and Casey have done an excellent job!

Sunday, October 28, 2007

The Fluffy Tribble!

Port Wine-Swiss Alm TribbleI crocheted a tribble today. What did you do?

Yes, that's right. For reasons I can't even begin to explain, I decided to crochet a tribble. Finally a use for that eyelash yarn I bought in a fit of insanity last winter!

Anyway, if you want your own tribble, it's a very simple pattern. I'm only posting it because a friend wants it.


Supplies
Yarn Bee Wild Child, Port Wine (one half skein)
Yarn Bee Wild Child, Swiss Alm (one half skein)

K hook
Yarn needle

Three handfuls of polyester stuffing

Hold two strands together throughout. It can be the same yarn, or two different ones.

Top half
Round 1: Using the magic adjustable ring, ch 1, then sc 8. Join.

Round 2: Ch 1 for the turning ch, then sc 2 in ea sc. (16 st)

Round 3: Ch 1 for turning ch, *sc 2 in next sc, sc 1 in next sc* repeat 7 more times, then join. (24 st)

Round 4: Ch 1 for turning ch, *sc 1 in next 2 sc, sc 2 in next sc* repeat 7 more times, then join. (32 st)

Round 5: Ch 1 for turning ch, *sc 2 in first sc, sc 1 in next 7 sc* repeat 3 more times, then join. (36 st)

Round 6: Ch 1 for turning ch, sc 1 in ea sc, join. (36 st)

Round 7: repeat

Round 8: repeat

Round 9: repeat

Leave a very long tail on this, three to four times the circumference of the piece; you'll use it to sew the pieces together.


Bottom Half
Round 1: Using the magic adjustable ring, ch 1, then sc 8. Join.

Round 2: Ch 1 for the turning ch, then sc 2 in ea sc. (16 st)

Round 3: Ch 1 for turning ch, *sc 2 in next sc, sc 1 in next sc* repeat 7 more times, then join. (24 st)

Round 4: Ch 1 for turning ch, *sc 1 in 5 next sc, sc 2 in next sc* repeat 3 more times, then join. (28 st)

Round 5: Ch 1 for turning ch, *sc 2 in next sc, sc 1 in next 6 sc*, repeat 3 more times, then join. (32 st)

Round 6: Ch 1 for turning ch, *sc 1 in next 7 sc, sc 2 in next sc* repeat 3 more times, then join. (36 st)

Round 7: Ch 1 for turning ch, sc 1 in ea sc. (36 st)


Assembly
I won't even pretend this is the best way to sew together a tribble; but it worked.

First, look at your tribble pieces and decide which side you want to be on the outside. It's quite possible that the wrong side will be fluffier; it was on mine. If necessary, use a yarn needle to pull the tails from the adjustable ring to the inside.

Place the wrong sides together. Thread your yarn needle with the long tails from the top half. Line up the stitches, and whipstitch the two pieces together using one or two stitches per pair of single crochet stitches. (Your two halves will probably have slightly different diameters, but both have the exact same number of stitches. As long as you line up the stitches, it will all work out.) Leave enough of a gap to turn your tribble right side out.

Once you've turned the tribble, stuff it. You don't want it packed firm, but you will probably need more stuffing that you think. (Unless you've made lots of stuffed toys.) Once you like your results, stitch the opening shut.

Knot the ends, then thread the needle with only one strand of the yarn. Squeeze the tribble flat, then push the needle into the seam near the knot and pull it out through the top or bottom of the tribble. Still squeezing the tribble, trim the end close to the piece. Once you let it go, the end will disappear into the body. Repeat with the other strand of yarn.

The seam will probably be very visible, but you can fix that. The long fluffy pieces will be stuck in the seam. Use your needle or fingers to pull the fibers loose, and the stitching will disappear. Take care, though, that you don't snag the body of the yarn (the thick part you crocheted with.)


And that's it. This is my first time writing out a pattern, so I hope it makes sense.

Tuesday, October 23, 2007

Wheel of Time Scarves

Pevara Sedai ScarfI love CraftBorg, which is a really fun, totally geeky podcast. The hosts, Rosemary and Julie, are big fans of both Harry Potter and Star Trek (yeah, no surprise there), as well as all sorts of other fangirl stuff. Sadly, they haven't updated in months, but there are seventeen episodes available.

Anyway, they both make Harry Potter socks. No, not socks with the Harry Potter characters on them, or house-striped socks, or socks from the movie. They make socks inspired by and named for Harry Potter characters. They choose colors, patterns, and yarns to reflect the character's personality, interests, and tastes. As soon as I heard that, I thought, "Oh! I love that!" Of course, I have no interest in making Harry Potter socks, but I love the concept: letting the characters from your favorite fiction shape your knitting!

Now think about the Wheel of Time...there are so many interesting characters! And Robert Jordan always puts such effort into each character, so there's plenty of material to work with. So, I've decided to make some Wheel of Time scarves... I love scarves, so it's going to be fun!

My first scarf is for Pevara Tazanovni, an Aes Sedai of the Red Ajah. As a novice, she was close friends with Seaine Herimon, but had to break off the friendship upon gaining the shawl. When Elaida charged Seaine with searching out the Black Ajah, the White recruited Pevara to help.

Pevara, a pretty woman with dark eyes and a cheerful nature, is not your typical Red: she actually likes men, and she's quite notorious for her belief that Reds would find Warders useful. She is open to Aes Sedai of other Ajahs, even though the Red Ajah strongly discourages friendships outside the Ajah.

I'm doing the Turkish Stitch version from A Trio of Scarves. I chose South West Trading Company Bamboo in Red Jester. The deep reds represent her ajah, of course, and the Turkish stitch is lacy buy restrained, which reflects the balancing act that has so shaped Pevara: the demands of her ajah versus the demands of her heart.

So far, I'm having a blast!

Monday, October 22, 2007

Warm Hands for Late-Night Gaming

Late-Night Gaming WristablesI'm a total night owl, so most of my online gaming (Guild Wars or Diablo II) happens late at night. Cold hands are the bane of my existence in the late fall and winter, and we've already had a couple of cold-ish nights. So I decided to pull out my Andean Treasure 100% baby alpaca from Knit Picks and headed to Ravelry to comb through the handwarmer and fingerless glove patterns.

I decided to crochet a pair, since it's quicker. I'm making a modified version of the Wristables from Crochet Me. I'm pretty happy with the results so far: I've finished the first one, and I'm about halfway through the cuff of the second one. :)

Can't wait to finish! After that, I have to move on to my Christmas crafting...

Tuesday, September 4, 2007

Gearing up for Anime Weekend Atlanta!

My friend Ishy and I from Craft Wonderland are selling some of our stuff at Anime Weekend Atlanta in two weeks. Boy, am I busy…

Monday, July 16, 2007

Spinning and felting and crochet, oh my!

Well, on the spinning side, I received a very prompt, very helpful reply from the Peachtree Handspinners Guild. It turns out that Interweave has a couple of free, downloadable brochures on spinning that look helpful. The kind woman who responded suggested that I attend their next meeting (at the end of the month), too. I'm really afraid I'll learn to do it horrendously wrong, so I think I'll put the spinning aside until then.

So, needle felting. Emily Barnard of Colorado Fiber Arts has the most amazing needle felted animals, at Art in Sheep's Clothing. Wow. That's intimidating. Someday, maybe, I can do that sort of stuff. Now, I'm more up to the cute little needle felted birds she teaches in her class. Or a needle felted ball, maybe.

Oh, I know! How about an eyeball, like the crocheted one at Monster Crochet? Big round ball, two concentric colored circles in the center...I can do that!

Did I mention I'm insane? I have to finish a crocheted Katamari...by Saturday. Somehow this slipped my mind. I'm using Simply Soft in Dark Country Blue (I think...it looks darker to me) for the body, with Berry Blue and Dark Country Blue in concentric circles for the little bumps. I hope to make it (semi) functional... Really, the pattern is just a really big crocheted ball, sort of like this one. I'm crocheting it with two strands held together, using an I hook, for the body; I'll probably use just one strand for the bumps.

I'll post pics when it's finished.

Friday, July 13, 2007

Vacation crafting

Okay, I took several knitting and crochet projects on vacation with me. I figured, "All those hours in the car? I'll get tons of stuff done!" Uh, yeah. Apparently being on vacation means I'm suddenly unable to knit! About all I could do was crochet, though I even had to frog some of that!

Here was the plan: finish the backpack I was crocheting, start and finish the MagKnits Saturday Market Bag (modified in a manner similar to Disdressed's), work on my dragon stole, maybe start a new project.

Uh yeah. Right. Best laid plans and all that.

What really happened: work on backpack, frog, redo until I like the way the shape is working out. Figure out I'll never finish it in time to go hiking. Stop with one strap begun, but only two inches long.

Cast on market bag. Frog. Cast on market bag. Frog. Cast on market bag. Knit two rows. Frog. Cast on market bag. Knit two pattern repeats (eight rows). Put in lifeline. Knit three rows. Put down. Start fourth row. Almost fall asleep. Put away. Pull out knitting and realize I've lost stitches. Try to fix. Frog to lifeline. Knit four rows. Realize something is wrong before lifeline. Frog to beginning. Cast on. Knit seven rows. Frog. Cast on. Knit six rows. Frog. Cast on. Knit ten rows. Frog. Cast on. Knit six rows. Get to Atlanta. Knit six rows perfectly while riding bus and walking home.

Yeah, it was frustrating. And now, one row from a pattern repeat (and lifeline), I've messed up. I was talking to my husband, and I have no idea what I did.

/sigh

Sunday, July 1, 2007

Serendipity Needleworks, Tuscaloosa, Alabama


I spent about an hour and a half at Seredipity Needleworks in downtown Tuscaloosa this morning (actually, yesterday morning, but I haven't been to bed yet). I had a great time. There were so many beautiful yarns everywhere! I wasn't really optimistic when I saw the "Needleworks;" I figured it would be mostly embroidery, with some yarn thrown in. But to my surprise, there was tons of yarn and a great selection for embroidery, too.

The owner was so nice. She was knowledgeable about yarns, both those she carried and those she didn't. She greeted me cheerfully when I entered and offered help, but was never pushy. When I needed help finding a yarn substitute, she was was able to offer me several options, and give me advice on needles. When she needed to step to the back, she checked first to see if I needed anything.

The customers were great, too. I chatted with some of the women there for the Sit 'n' Stitch, and they were all cheerful and enthusiastically discussed their projects and mine.

So, my purchases... One of the projects on my dream list was the Scribblin' Shawl from Mason-Dixon Knitting. When I saw the beautiful red Lang Venezia yarn, I knew the shawl would be my next project! The owner helped me find substitutes for the Rowan Kid Silk Haze used in one of the sample shawls; I went with Douceur et Soie in black, for the body of the scarf. It's only a few rows long (I need to finish my backpack), but so far I'm happy with it!

Other purchases: Classic Elite Cotton in red and Berrocco Cotton Twist in Satin Beige (a taupe-ish color) from the bargain bin, plus three ball-ends for $1 each.

Wednesday, June 20, 2007

Knit Picks is taunting me!


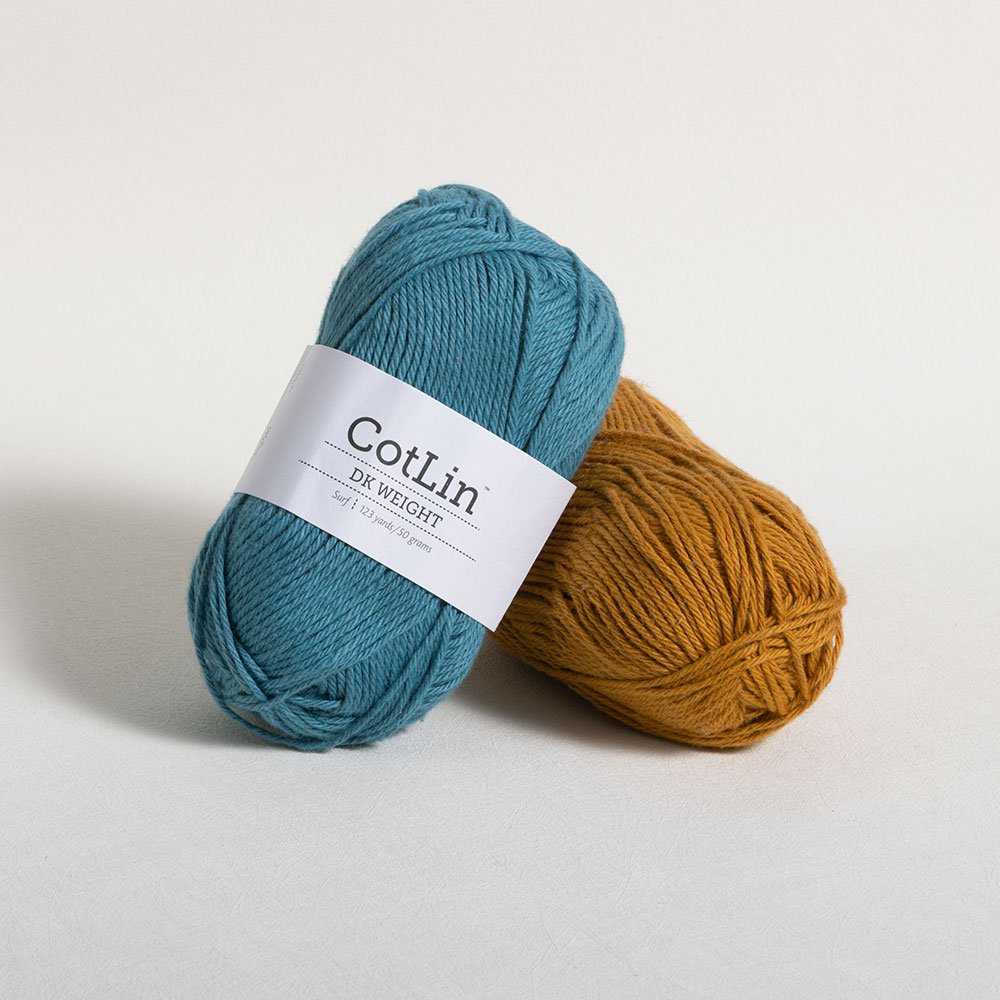
I've been longing for CotLin in Moroccan Red for almost two months. I bought some for Ishy last month, in Royal Plum. It's very pretty, and it seems practical too. But every time I check the page, red is out of stock. I go back and it's not in yet. First it was early June, then June 15, then June 18, and now June 25.

I just want the pretty red yarn! Is that so much to ask?

Sigh. I love Knit Picks, but this is driving me nuts!